
1.2, Getting Started

2, Second start writing this code.
</html>
<head>
</head>
</html>
define the HTML element in a more specific way.
<head>
<title>My
First Coding File</title>
</head>
</html>
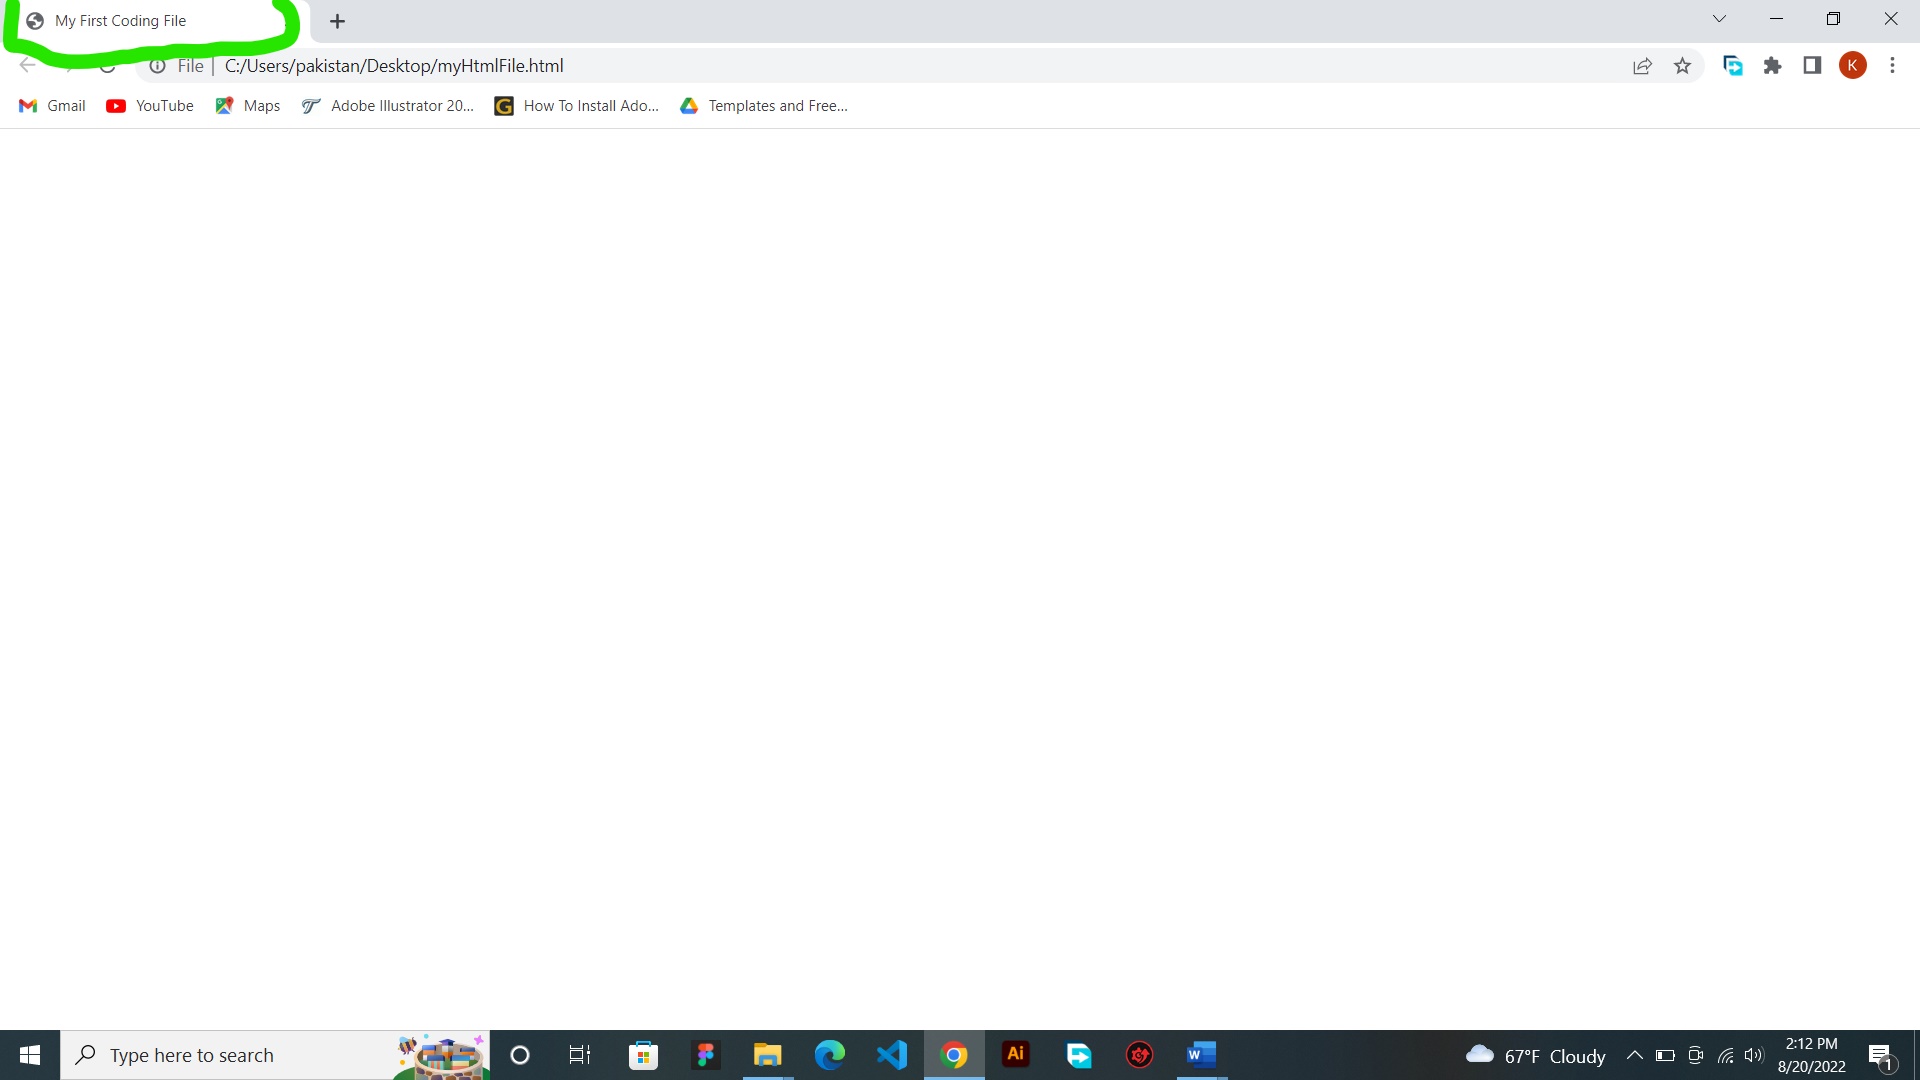
top of our tab
(browser tab) when we run this code.
Now let's run this code and see our progress.
Tip: RUN means to launch our code or execute our code.
💻 To run first let's save our file. Don't just save it because
there is a little trick.
💻 And the trick is to change this file type(.txt) to HTML file
type(.html).
💻 File types are called extensions. They are used to name a computer
file.
*If you just save your file normally on notepad,
it will be saved as a standard text document(.txt) which is mainly used to
write a simple text.
💻 But before saving it as a notepad file we will change it to HTML
file and save it.
💻 First click file on the left top corner of the window.

then click save as

💻Something pops up right?
Now let's write the name of our
file. We can say it 'myHtmlFile'.
Then click on the box at the bottom that says 'Text Document
(*.txt)'. Click on it and change it to 'All files'.
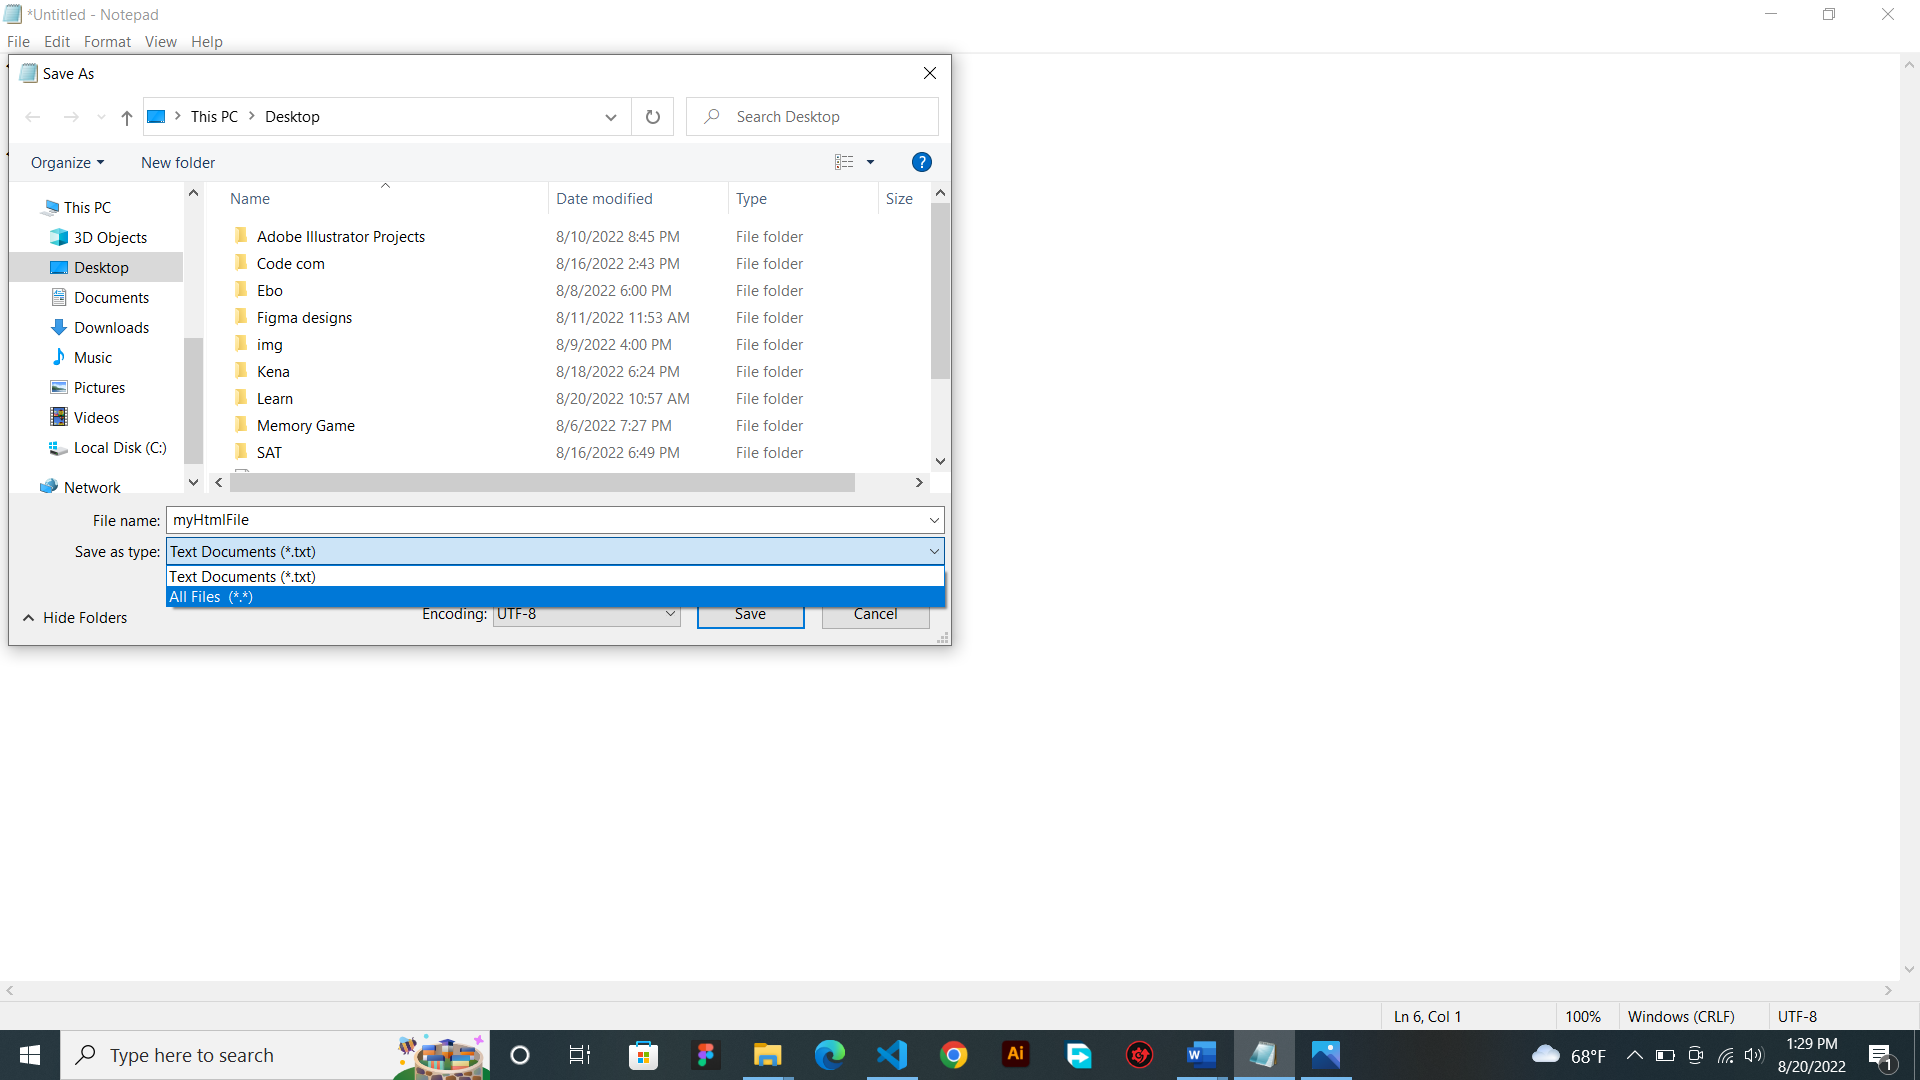
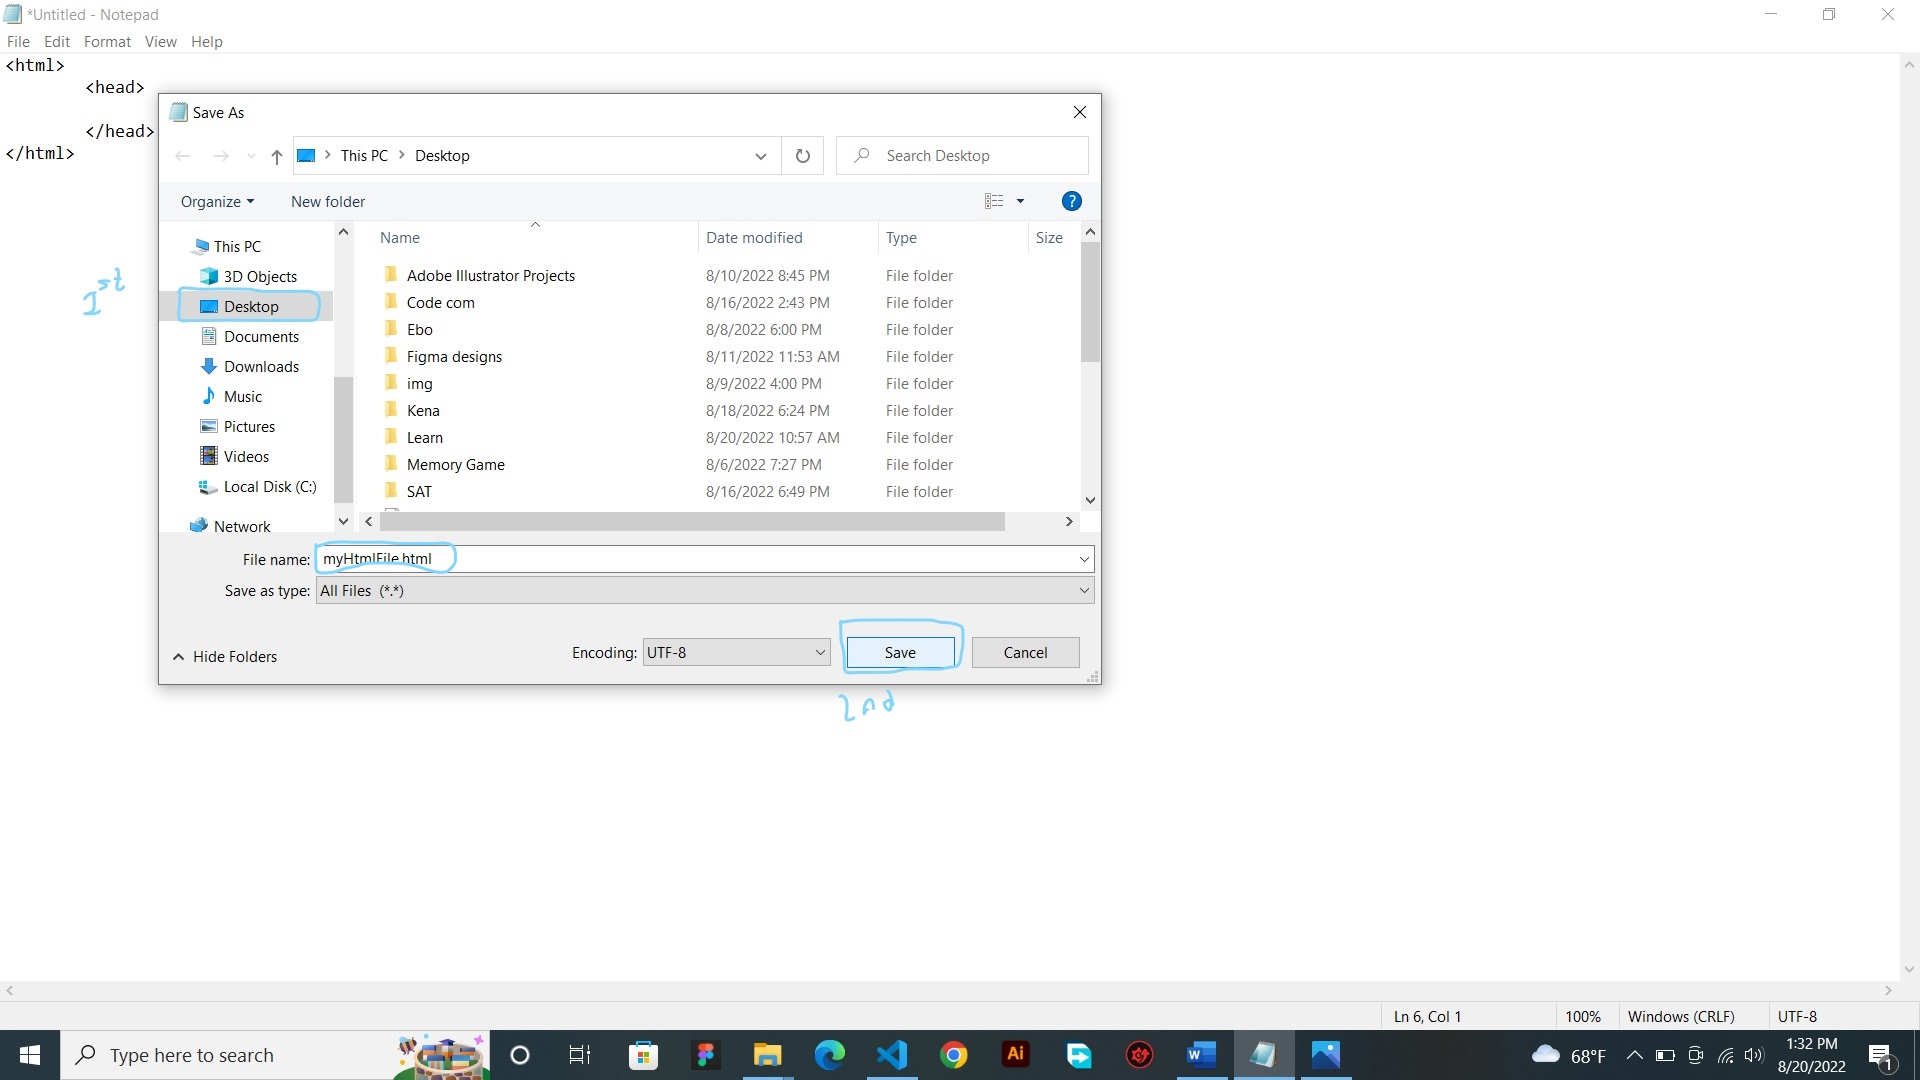
💻 To open it easily, let's click 'desktop', from the left bar.
NOW WE ARE GOOD TO GO. Let's save it.
And also, don't forget to write .html at the end. Like these
'myHtmlFile.html'
If you don't do it won't be an HTML file.
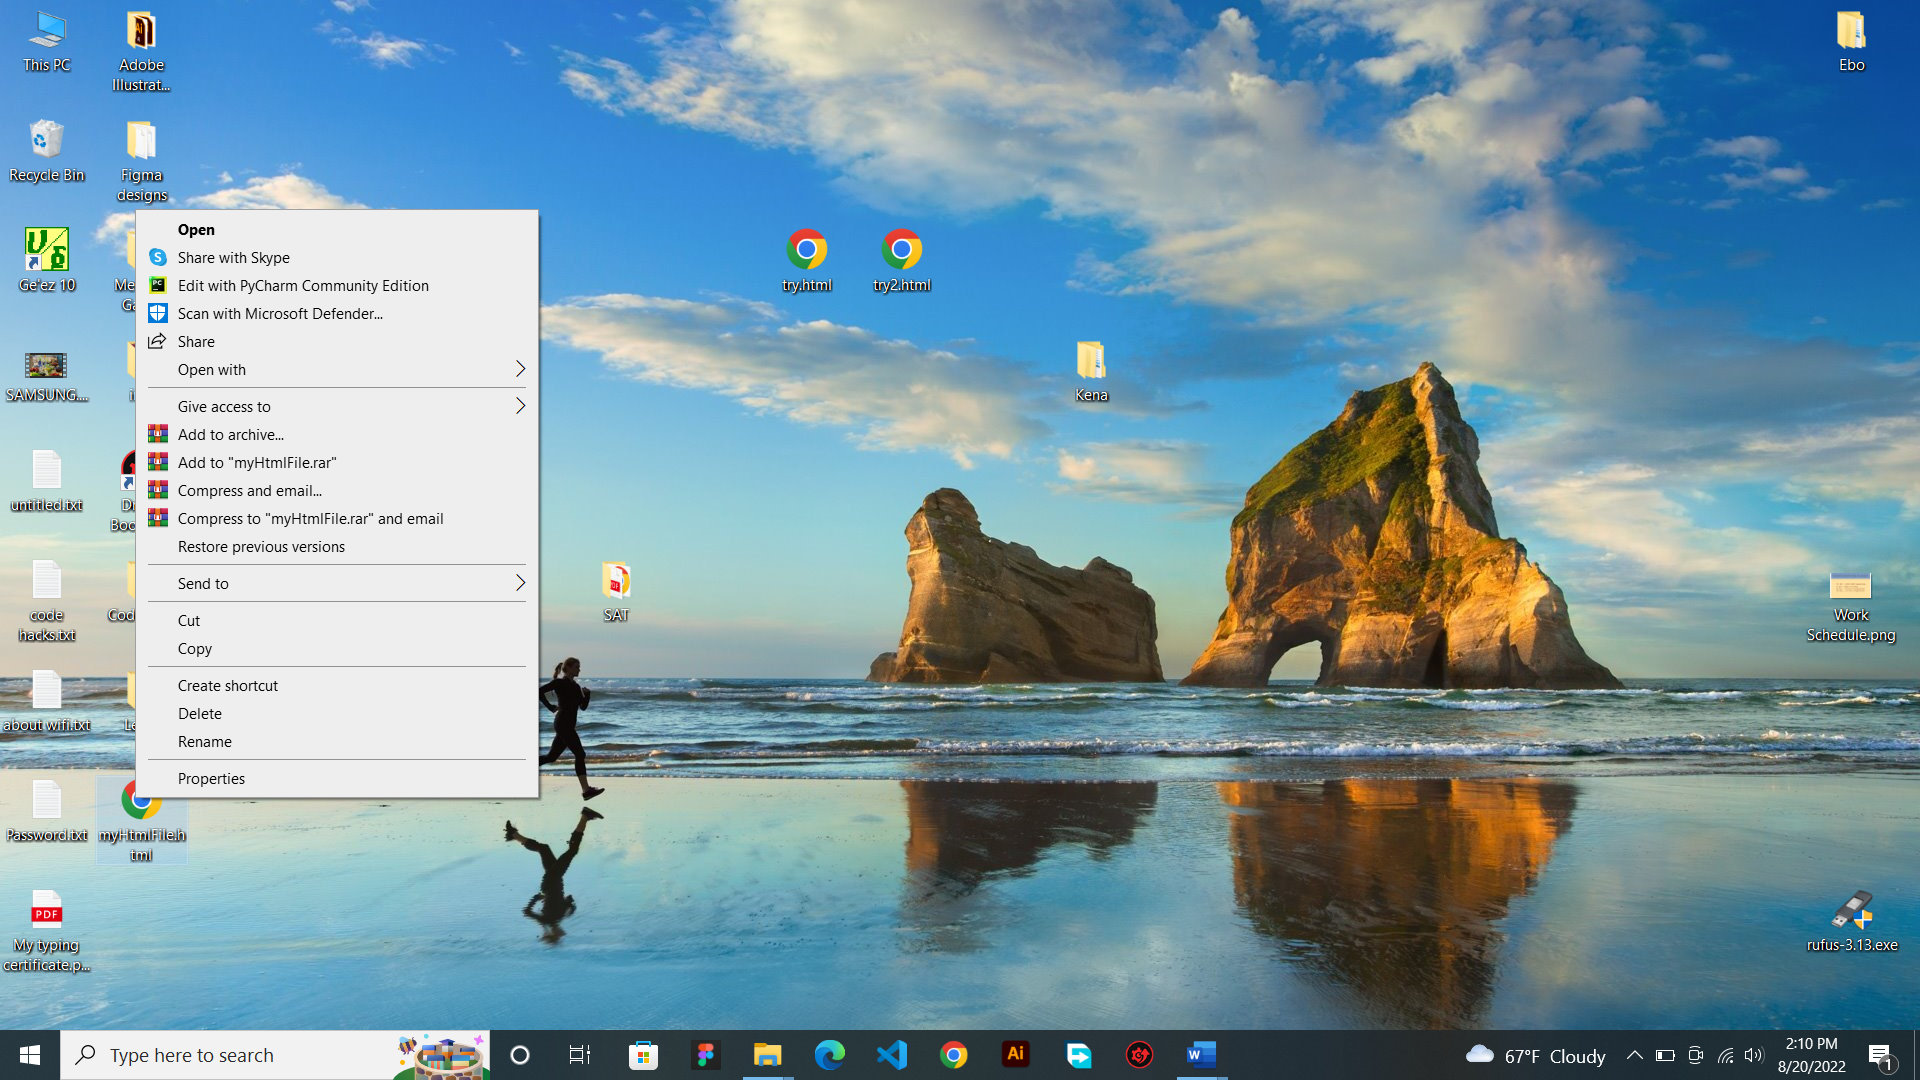
Now, to run the code let's just minimize all windows and get to our
desktop. Then let's go to where our file is.
Go to your
desktop and 'right click' on the HTML file we created earlier.
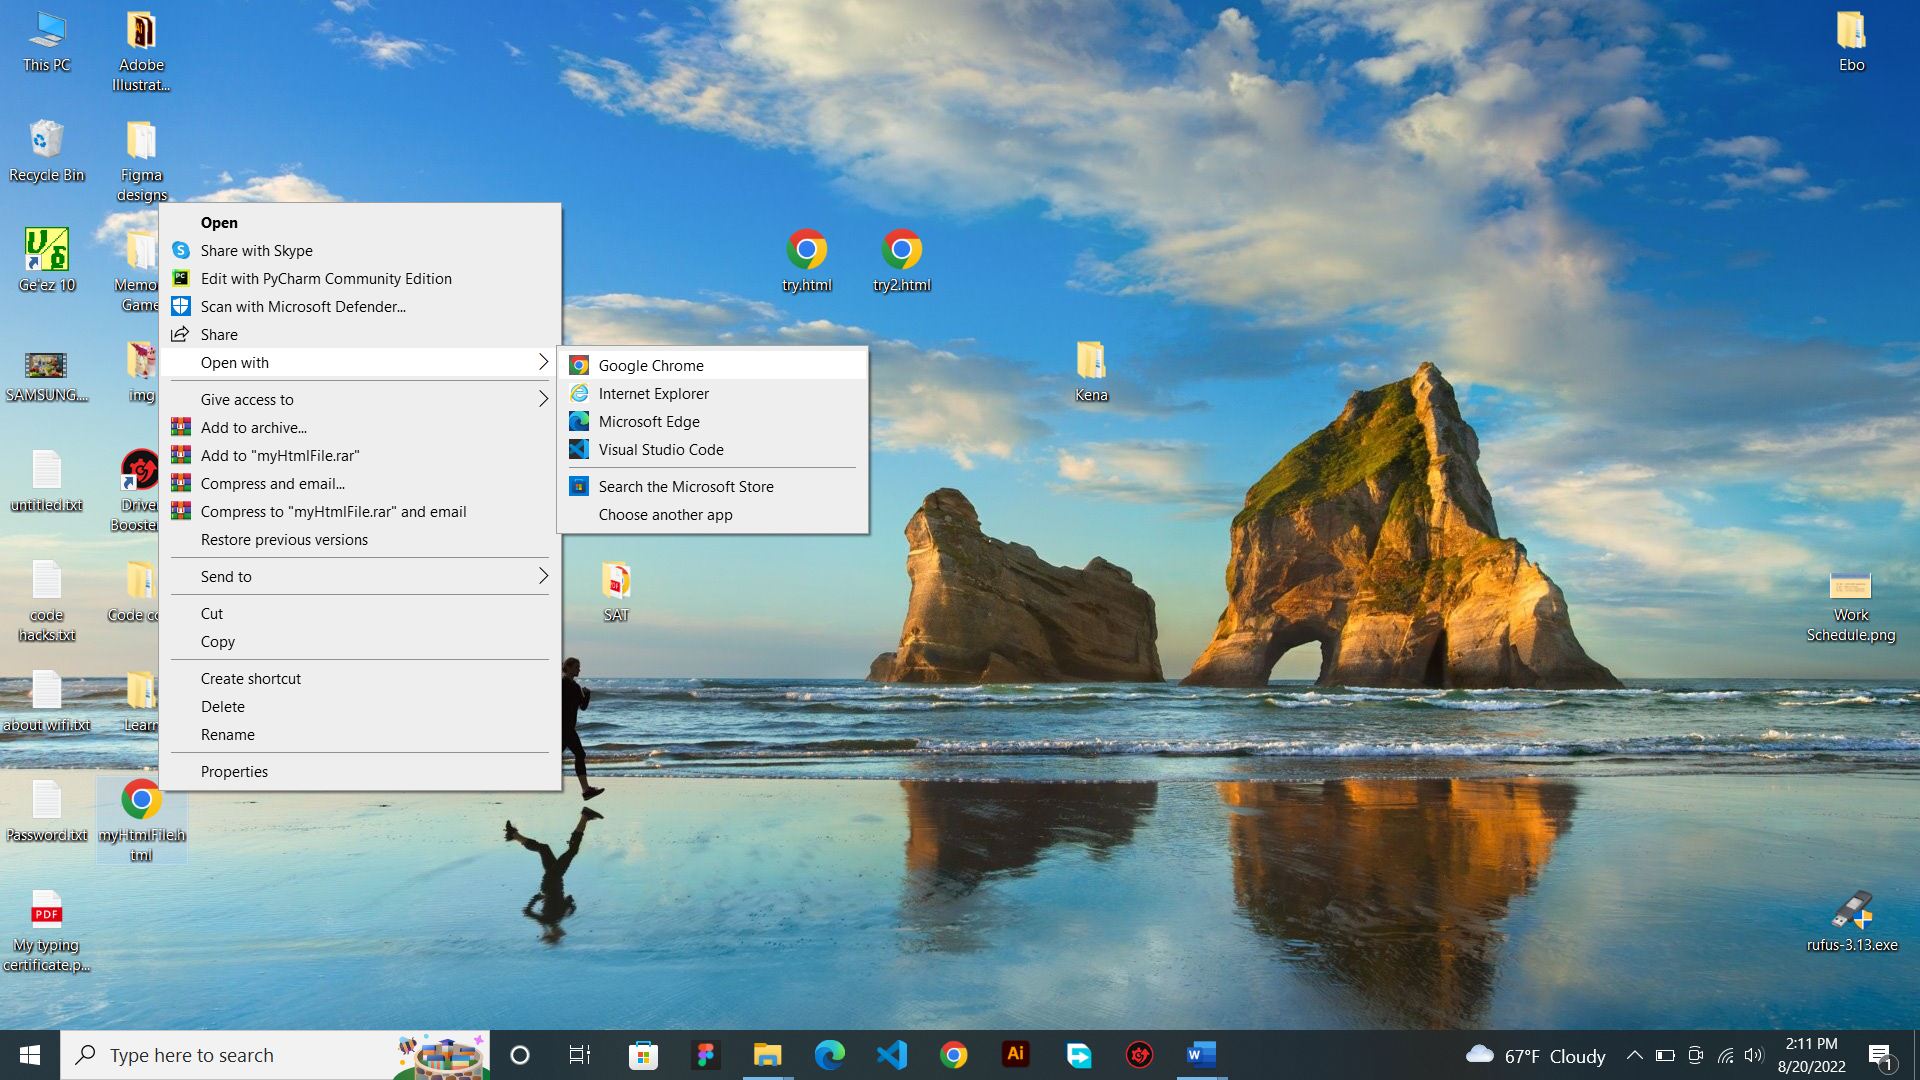
Then let's go to open with and then let's click on the browser we
want to open with. I will choose Chrome
for now.
Now, can you see our title on the top of the bar? Then hooray! We
did it.
Tip: Titles are not a must to open an HTML file but it's fun to add
them. And also, it's a good habit to have titles on our websites
because many of the websites on the internet have titles.