🙂 Almost all websites online do have images inside. Therefore, it's necessary to learn how to insert images on your website.
Follow the steps below to insert your image.
1. Open up notepad.
2. Code up the code below!
NB: Try not to copy paste. It is good for you to code it by yourself since you've learned it in the previous lessons!
<html>
<head>
<title>My First Image</title>
</head>
<body>
</body>
</html>
3. Inside the body tag open up an image tag.
✏️ An Image tag is represented this way '<img>'.
✏️ It is a type of tag where a closing tag isn't needed for functionality.
<img>
</img>
Wrong
<img />
Right
🙂 So, your code must look like this now.
<html>
<head>
<title>My First Image</title>
</head>
<body>
<img>
</body>
</html>
4. In your img element type 'src' with an equal sign and a quotation mark. <img src="">.
✴️ Src represents the image source.
<html>
<head>
<title>My First Image</title>
</head>
<body>
<img src="">
</body>
</html>
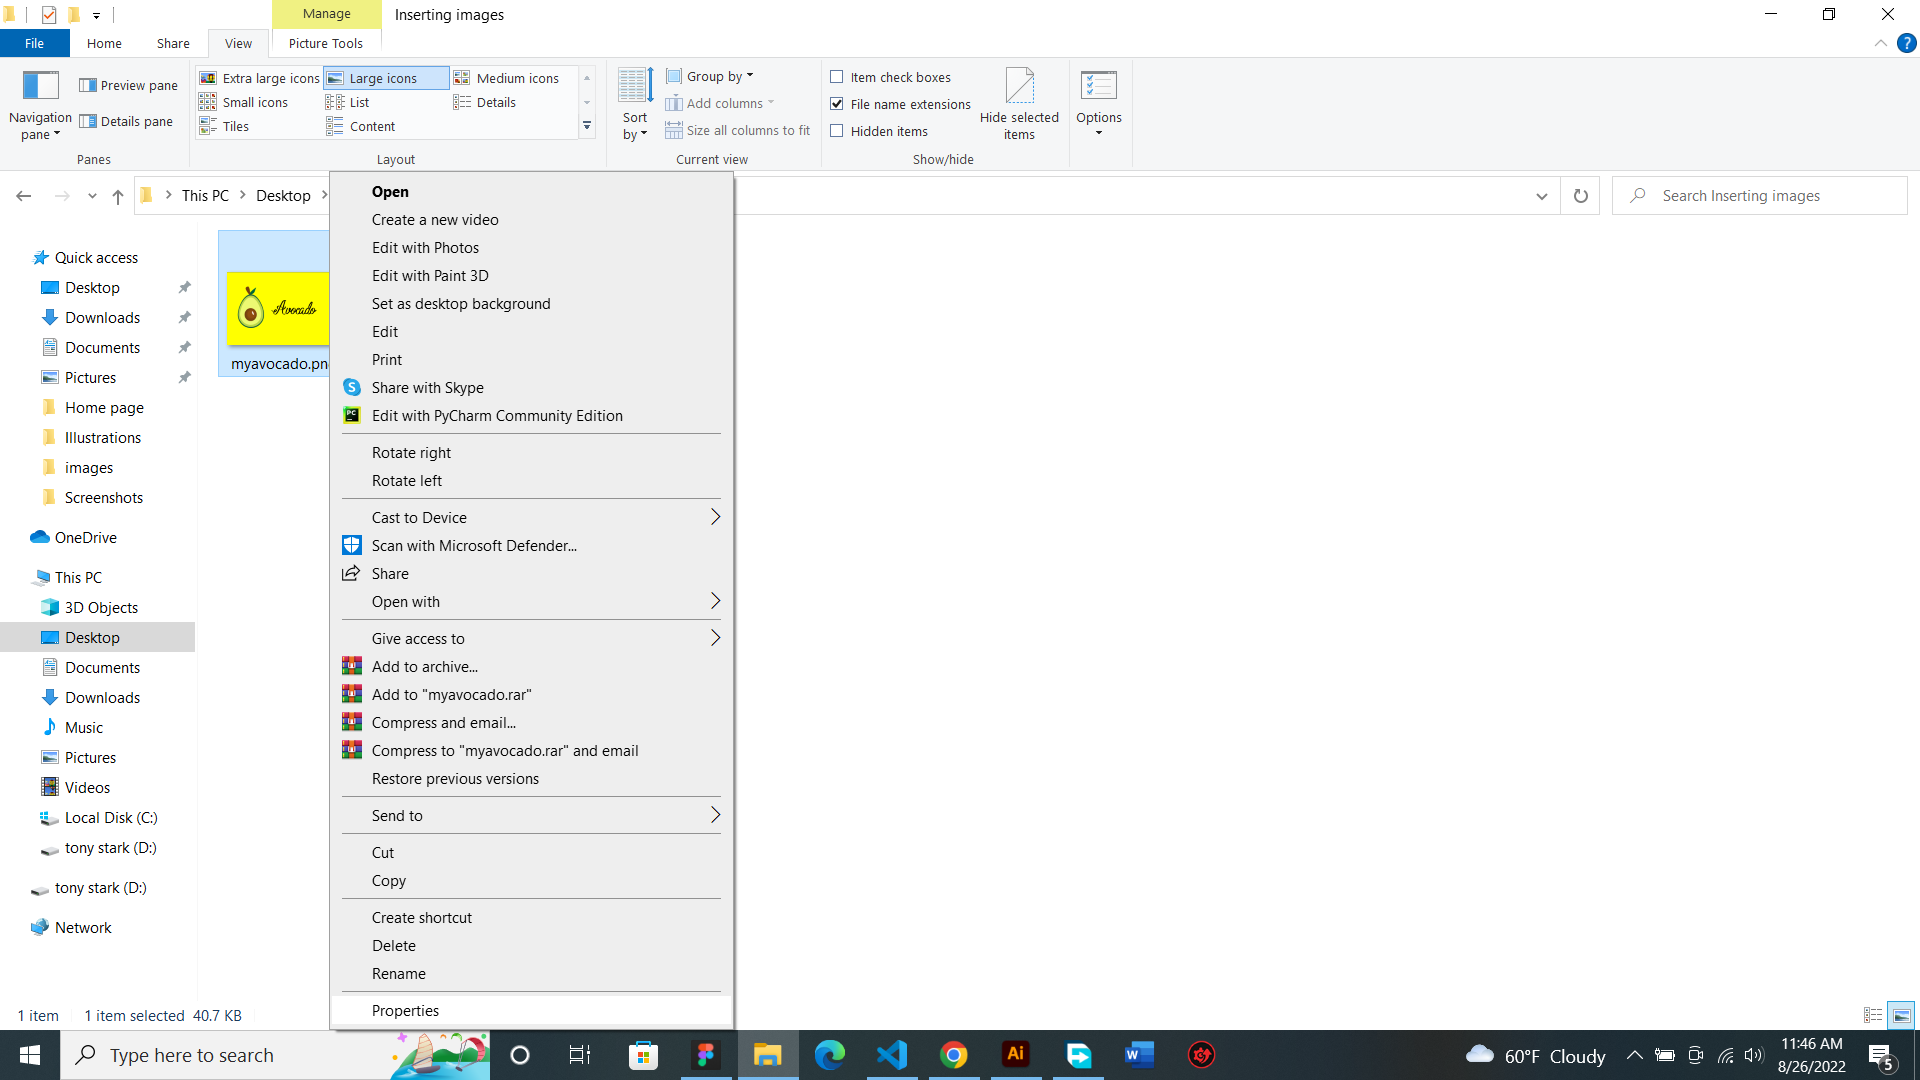
5. Go to your image file and right click on the properties section.

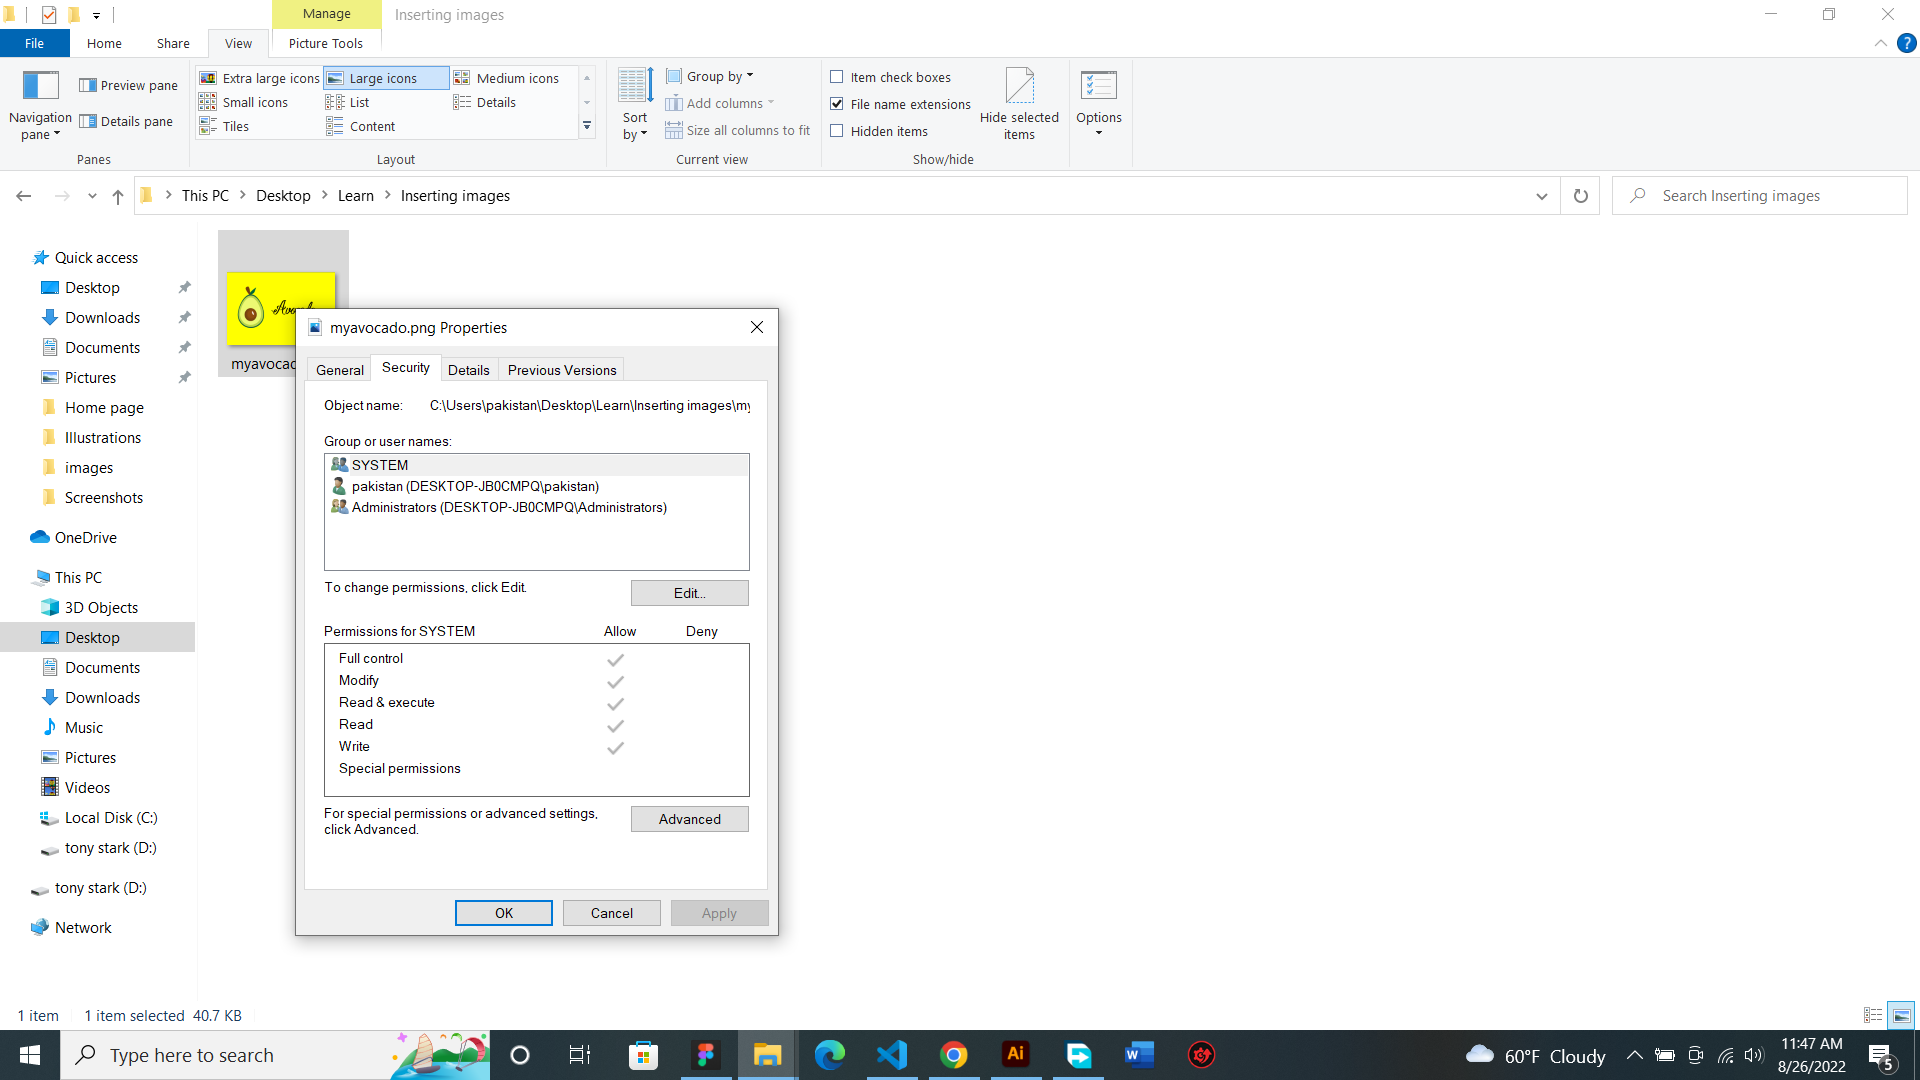
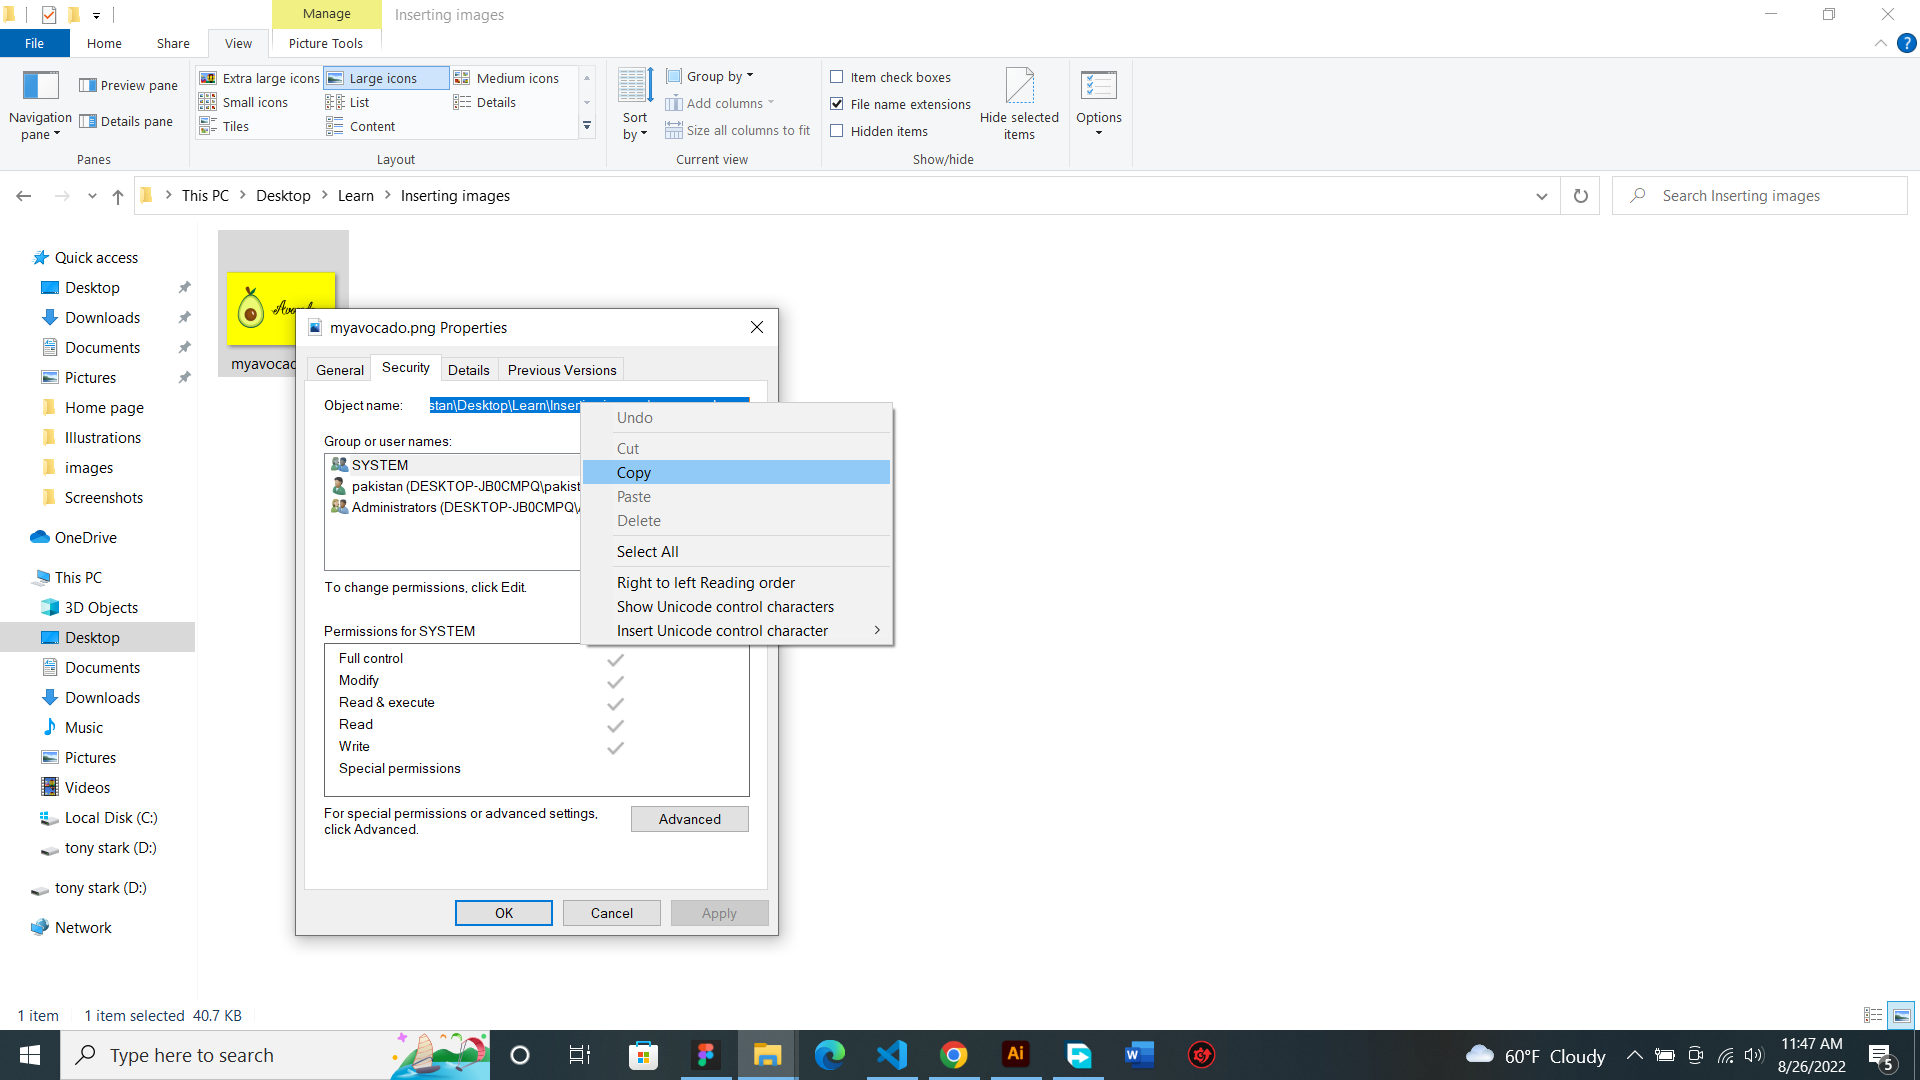
6. Click on securtiy and copy your Object Name.

 7. Go back to the HTML coded page you save earlier and paste what you had copied inside the quotation marks.
🤩 Lastly, save your file with an extension of '.html' and run it.
NB: After pasting your image source to your code and running it, if the image didn't appear for you should replace backward slashes (\) with forward slashes (/). That's the way it works perfectly. Otherwise, your code won't work.
<img src='C:\Users\pakistan\Desktop\Learn\Inserting
images\sandwitch.jpg'>
change this to
<img src='C:/Users/pakistan/Desktop/Learn/Inserting images/sandwitch.jpg'>
You have successfully inserted an image in your web page. 😎


